Roomio applies a standard set of room labels when your floor plan is drafted. If your market calls a room something different, you have had to request an amendment after delivery to correct it.
Custom Labels removes that step. We looked at which room labels get changed most often and opened up the top 25 for you to rename. Your wording is applied before drafting starts, so a simple label change no longer needs an amendment request.
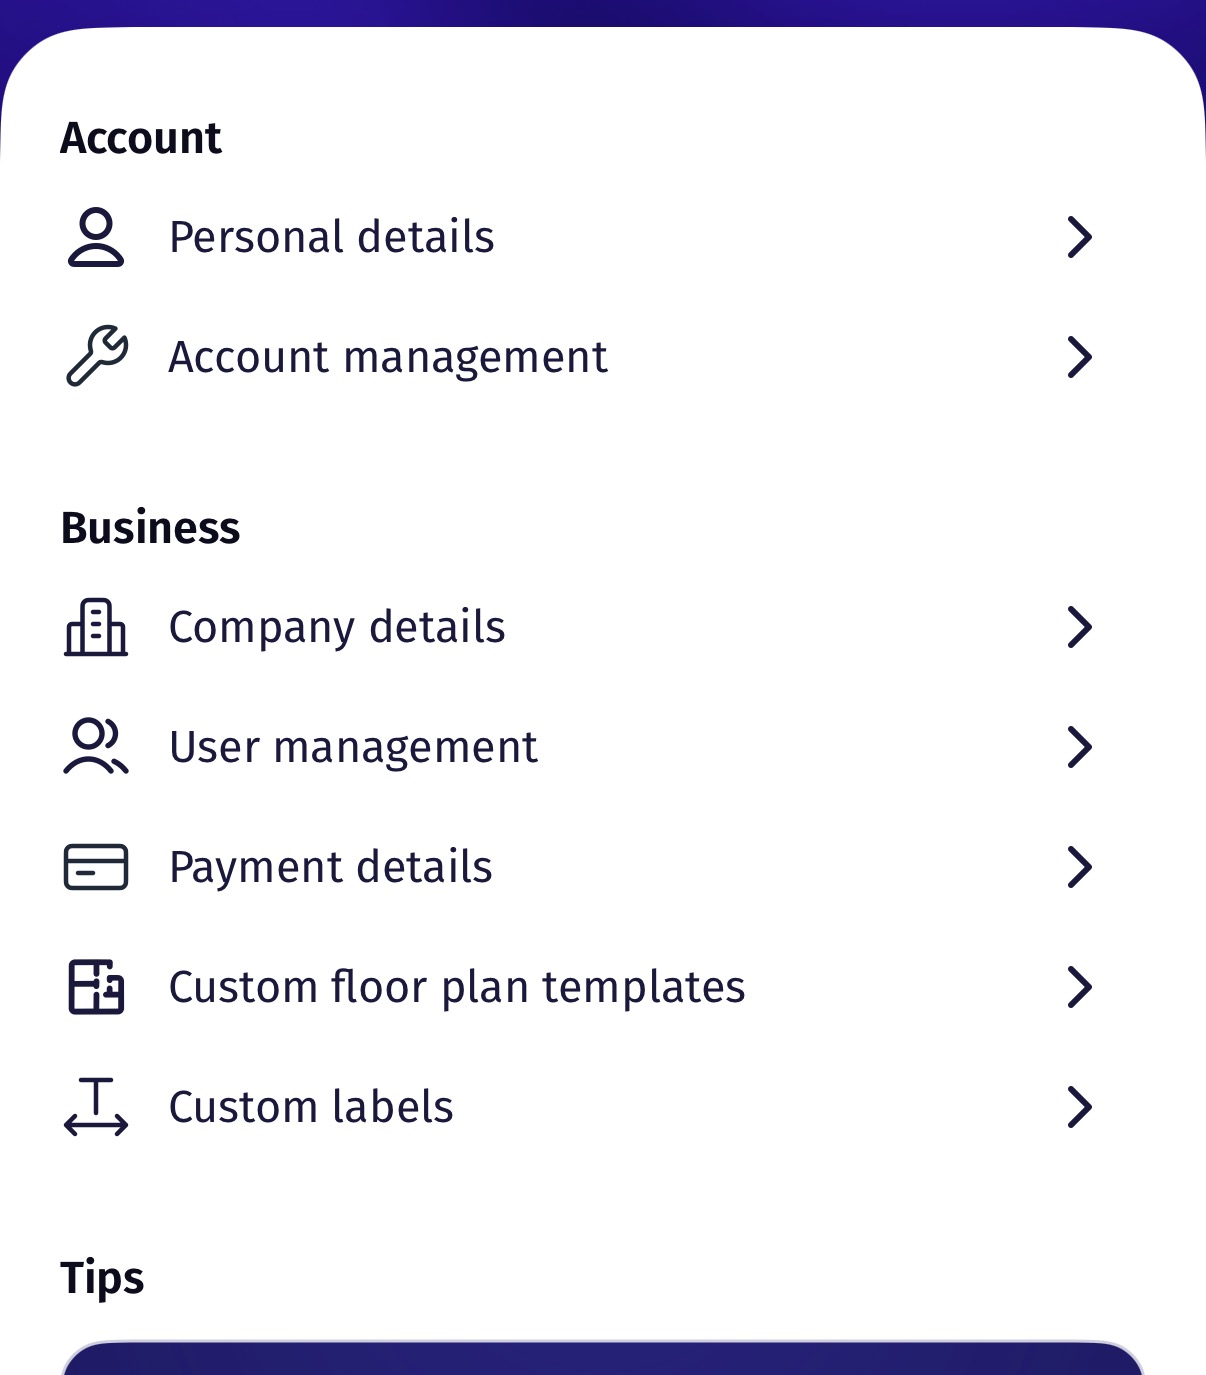
Setting your account defaults
Your account defaults apply to every future floor plan order.
1. Open the Roomio app.
2. Go to Settings, then Custom Labels.
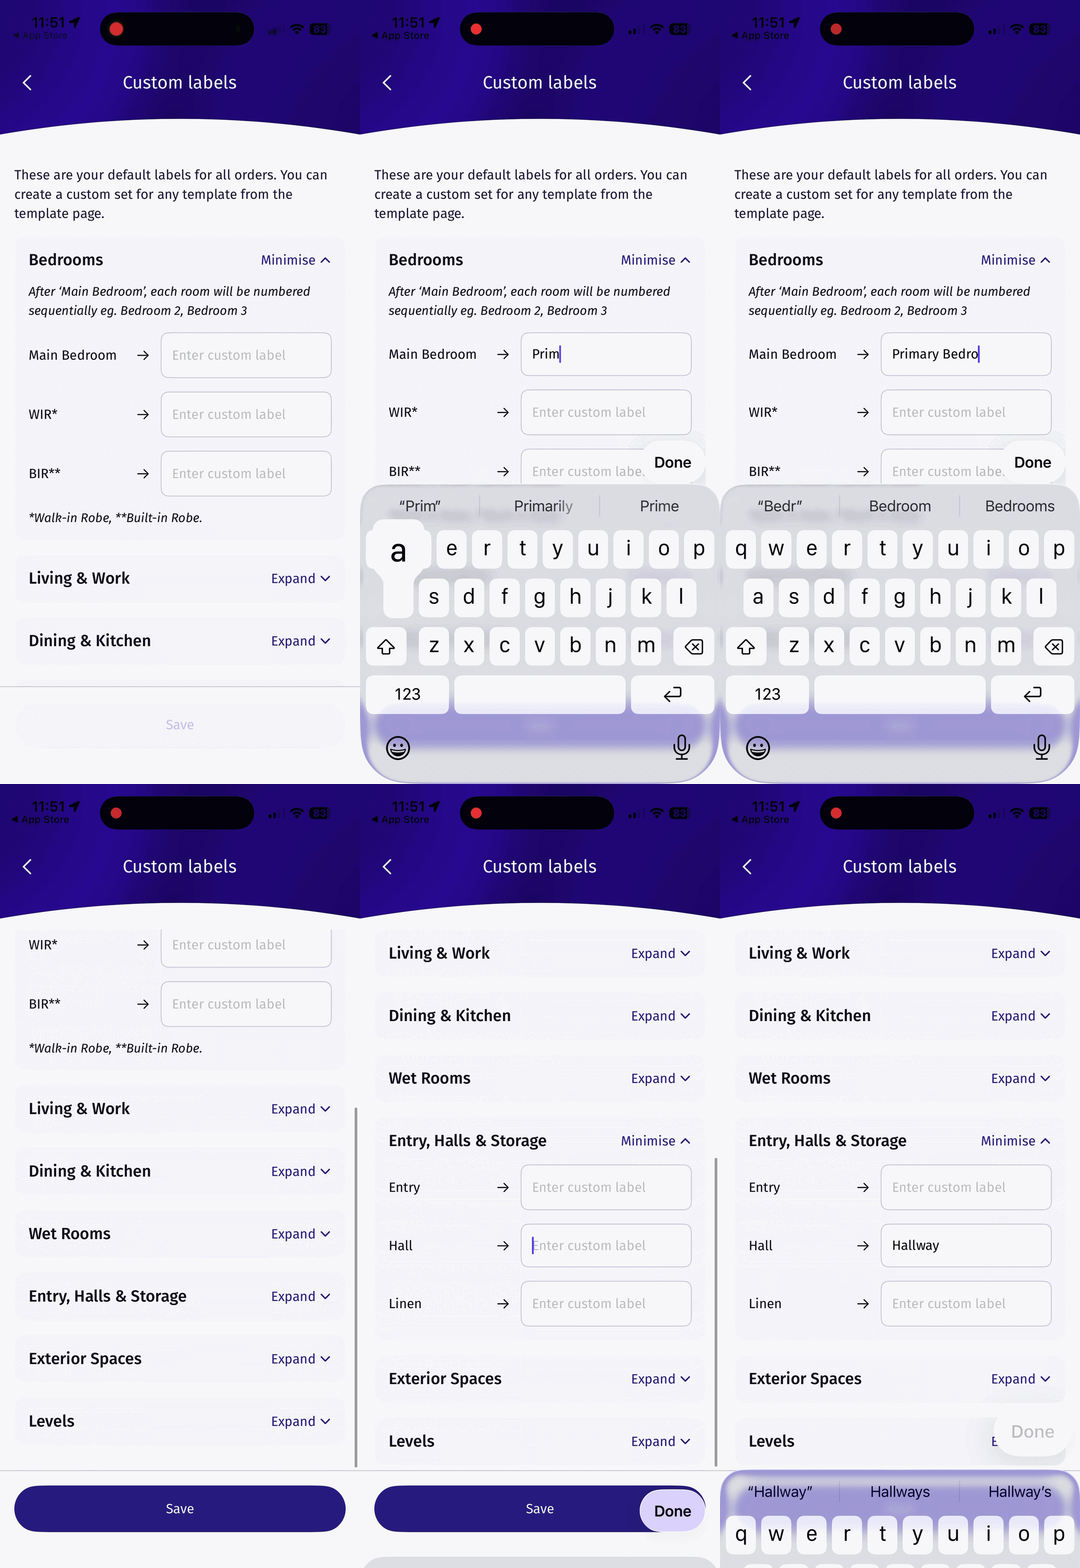
3. Find the label you want to change.
4. Enter your wording.
5. Save.
Your labels take effect on orders placed after you save.
Setting labels on a custom template
You can also set room labels on an individual custom floor plan template. This is useful when you produce work for more than one agency and each has its own wording.
1. Open your custom floor plan template.
2. Set the room labels for that template.
3. Save.
Which labels apply to an order
If the order uses a custom template that has its own room labels, the template's labels are applied.
For every other order, your account defaults are applied.
Where you have not set a custom label, Roomio's standard label is used.
Was this article helpful?
That’s Great!
Thank you for your feedback
Sorry! We couldn't be helpful
Thank you for your feedback
Feedback sent
We appreciate your effort and will try to fix the article